Showing posts with label Frosting. Show all posts

Tuesday, December 8, 2009

Triple-Layer Chocolate Cake with Chocolate Ganache

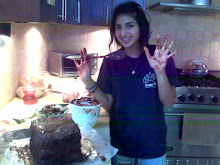
My dad's birthday was coming up, and while I can get away with baking a fudgy brownie to satisfy my friends chocolate cravings on their bithdays, the situation remains different with my dad. He loves anything with good solid chocolate, (who do you think is the one who seeks out for my gharadelli chocolate chips and eats them all?!), and since hes my dad, why not spend a day of baking with chocolate, chocolate, and more chocolate for his birthday?

Ever since I was lucky enough to indulge into a gourgousely layered rich chocolate cake at a wedding lunchen, I was inspired to make one of these cubes of heaven myself. I didn't challenge myself to far, as far as finding interesting flavors to incporporate into the cake, finding challenge enough in baking a huge batch of devils food cake enough for 3 cakes , evening out each layer of cake, layering them on top of each other with home-made ganache, and why not make some chocolate leaves to top it all of!

I found a great guided recipe for the whole thing, which was self-explained very well, and as far as the cake, it tasted so good (with a hint of instant coffee added) that I'll definatly consider using the cake recipe to incorporate into others. The link from where I found the recipe (though I increased the serving size of the reipce) can be found right here: http://www.davidlebovitz.com/archives/2007/08/devils_food_cak.html

Below I posted my pictures of this decadent delightful chocolate cake through the steps I took in making it, but I must warn you, side affects may include extreme drooling and sudden intence chocolate craving...


1.


2.


3.


4.


5.


6.


7..
All you have to do to make chocolate leaves is spread a layer of melted chocolate onto clean leaves, and peel the chocoate of once its hardened. Use a little bit of the access melted chocolate as glue, to stick the leaves onto the cake.


8.


9.

Tuesday, August 18, 2009

Red Velvet Cupcakes with Cream Cheese Frosting

Their arn't many times when I'll bake a classic cheesecake, five layer chocolate cake, or one of my favorites, red velvet with cream cheese frosting. The only times I do bake heavy duty classics are most likely when I'm baking it for someone else. If I were to bake it for my family, it would be very likely, too likely in fact, that I would eat a big slice everyday, which is why I always try baking lighter treats. But sometimes, after you've managed to squeeze in some long walks in the morning, you're in the mood for baking, you want something that will put a huge smile on your face, and not to mention you've got some red food coloring on hand...then it is time to bake some red velvet!!

I decided to go with red velvet cupcakes and found a recipe on allrecipes.com. The link to the recipe is http://allrecipes.com/Recipe-Tools/Print/Recipe.aspx?RecipeID=105768&servings=20.
The only changes I would make when baking these are putting only 1/4 cup of cocoa powder instead, because I found the fll 1/3 cup to be too much, and then putting half oil, instead of all butter, because I would have prefered the red velvet cupcakes to be a little moister.

I also used half white flour, and the other half whole wheat flour, which didn't make a dramatically noticably difference, except the color of the batter wasn't able to get as deep and rich of a red as I would have liked, but none the less, they were definatly still red.


When even amounts of the batter was all scooped into each cupcake tin, they went into the oven and then finally came back out


But I couldn't start scarfing them down just yet. Because a red velvet cupcake without cream cheese frosting, to me, is like an oreo without milk! So I had to wait for the cupcake to cool, and in the mean I made a cream cheese frosting to go with it.

I only had an 8 ounce cream cheese jar, which was 1/3 empty, so I mixed that with 1/4 cup of softened butter, then added a drop of vanilla and gradually added 1 1/2- 2 cups of powdered sugar (however much you need to make it as thick or thin as you like)

So finally the cupcakes had cooled and the cream cheese frosting was ready, so I dolloped a spoonful onto each cupcake and spread it out with the spoon itself, eagerly trying to get them finished so I could eat one asap!
I crumbed the smallest cupcake (because who wants to have to eat the smallest one?!) before I frosted it, onto all the other cupcakes after they had been frosted.


About 30 pictures of red velvet cupcakes later, I was finally able to reach for one of them for myself...

...and it was love at first bite!!

Saturday, July 25, 2009

Lots and Lots of Different Cupcakesss!

Through out last year, I baked plenty, but didn't think of making a blog at that time, so I rarely photograghed my food. I was looking through old pictures and was fortunate enough to find a picture of something I had baked for a friend's birthday. We had a memory of craving cupcakes after passing a sprinkles cupcake and crumbs cupcake shop and so of course I went with cupcakes! She's one of my closest friends, so I decided on making her a variety of cupcakes with flavors she picked out.
I don't remeber the basic cupcake recipe I used, but the flavors added are simple enough to add to any cupcake recipe you like
The picture quality itself isn't that great and each cupcake was only photographed once so I didn't have much variety to choose from for the best looking pictures of each. The little papers stuck onto each cupcake have the flavor and frosting types of each cupcake written on them, though its sort of blurry

Cupcake #1
Flavor: Vanilla Cupcake with Nutella Swirl
Frosting: Vanilla Buttercream mixed with Nutella
Topping: Small Chocolate Chunks and Tuxedo Chocolate Covered Strawberry


Cupcake #2
Flavor: Chocolate Cupcake with Reese's Peanut Butter Cup chunks
Frosting: Peanut Butter Frosting
Topping: Reese's Peanut Butter Cup Crumbles

(the link to this recipe is originally from http://icecreambeforedinner.blogspot.com/2008/07/chocolate-peanut-butter-cup-cupcakes.html, an amazing and absolutely deliciousss blog!)

Cupcake #3
Flavor: Cinamon Sugar with Pecans and Walnuts
Frosting: Cinamon Cream Cheese Frosting
Topping: Pecans and Walnuts and and a Small Sprinkle of Cinammon


Cupcake #4
Flavor: Chocolate Cupcake with Chocolate Covered Caramel Chunks
Frosting: Vanilla Buttercream with Nutella Swirls
Topping: Chocolate Coated Caramel Chunks and Chocolate Covered Strawberry with White Chocolate Stripes


I packaged all 4 cupcakes up in a plastic container and took it to school the following morning to surprise my friend and make her birthday nutrition/lunch at school a little more satisfying ;)

Monday, July 13, 2009

Whole-Wheat Cupcakes/Muffins with Homemade Frosting

My little cousin had to bring treats to her camp for the last day. My aunt called me up and told me she was going to bake something with my cousin and asked me to help.

She uses this basic recipe for all her cakes, cupcakes, and recipes which originally came from an apple cake recipe:

-6 eggs
-2 cup. Sugar
-3/4 cup. Oil
-3 cup. Flour
-3 Tsp. Baking Powder
-1/2 cup. Orange Juice
-Vanilla

Directions:
1. Mix the eggs, sugar, oil, and vanilla together.
2. In a separate bowl, mix the flour and baking powder together
3. Alternate adding the flour and baking powder mixture and the orange juice to the wet ingredients, starting with the flour and ending with the flour
4. Bake at 350 for 45 minutes.

My aunt changed the recipe up a little by using what she only had on hand
The flour she used was whole-wheat and used light brown sugar
She also didn't add the orange juice, which gave the cupcakes a texture of muffins.

The cupcakes should get filled up about 2/3 full each

Scooping the batter into the cupcake tins with an icecream scooper, is a great technique, because it assures even amounts of batter in all the cupcakes

Even with the texture of a muffin, after they had baked and then cooled, they got frosted with a homemade frosting

Frosting Recipe:
-1 cup butter, softened
-8 cups confectioners' sugar
-6 tablespoons milk
-2 teaspoons vanilla extract

You can just beat all the ingredients together in a mixer making sure to add the confectionary sugar a cup or two at a time. It will be pretty thick, so if you want it creamier just add a couple more tablespoons of milk.


And with a little food coloring, the frosting was turned into a light blue, which got swirled onto each cupcake


Of course my cousin made sure that each cupcake got a nice big sprinkle of a princess sprinkles mix

Wednesday, July 1, 2009

Girly Girl Birthday Cake

When my cousin turned 3 years old in June, I baked her cookies with sprinkles. Simple as they were, that also meant her older sister who was turning six, excpected me to bake her something as special, with a little more awareness towards the definition of 'big and special'. I would have gone with cupcakes with colorful frosting designs on it, but when my grandma called, informing me we would all get together at her house for my cousin's brithday and wondering if I could bake a cake, I decided to comine her big birthday treat into one really special cake.

I already knew it would have to be a pink super girly cake, and tryng to kick it up a knotch, I decided to make it int0 a brithday cake as well. Usually, I would have a contrast as one layer vanilla and one chocolate, but she wanted everything in the cake to be vanilla and no chocolate.

For the basic cake I used a recipe my aunt always uses her friend had shared with her, wich is originally meant to be an apple cake, but has such a nice moist flavor but still sturdy texture to it, that I used it for the cake part.

-6 eggs
-2 cup. Sugar
-3/4 cup. Oil
-3 cup. Flour
-3 Tsp. Baking Powder
-1/2 cup. Orange Juice
-Vanilla

Directions:
1. Mix the eggs, sugar, oil, and vanilla together.
2. In a separate bowl, mix the flour and baking powder together
3. Alternate adding the flour and baking powder mixture and the orange juice to the wet ingredients, starting with the flour and ending with the flour.
4. Bake at 350 for 45 minutes.

This recipe was enough to fill up to round cake pans


I used one one of these same cake pans to press ice-cream into after i covered the pan in a layer of plastic wrap to make taking the layer of icecream out easier


To attach all the layers i bought premade frosting, and flavored one with pureed strawberries that i sifted all the seeds out of, knowing my cousin would enjoy the flavor from them.
The only flaw of adding the puree was that it took away a good amount of the sturdy/thick texture the frosting originally had

The assembly of the cake went like this:
1. A layer of cake
2. A layer of frosting
3. A layer of ice-cream
4. A layer of frosting
5. A final layer of cake
<--It would have helped if the icecream would have been more frozen and the frosting wouldn't have been as liquidy from the strawberry purree, to have helped keep its shape better
After everything firmed up a bit better in the freezer, i covered it in a layer of light blue frosting (that being my cousins second favorite color)
I also whipped up some cream coloring it with food coloring since the strawberry purree would have made the cream to heavy to whip up properly, and the covered the whole cake with it after it had fully hardened in the freezer
I decorated it by piping designs with the access cream I had leftover

At the very end I had very few spinkles leftover from previously, and sprinkled it onto the flower and her name (not photo-graphed)
Overall the cake was delicious, but the ice-cream was very messy and wouldn't firm up enough, even with sitting a few hours in the freezer

Sunday, June 28, 2009

Brownies with Caramel & Chocolate Frosting & Nuts..oh my!

My cousins birthday was a couple of weeks ago, and of course he wanted a big batch of brownies made just for him. In our family, we never mind going to the extreme with our sweets, so since i could quickly prepare some chocolate brownie frosting with nuts and caramel on hand...

For the brownie base you can use any of your favorite brownie recipes but i wouldn't recomend a real thick and fudgy brownie since the brownies are going to have a layer of frosting and caramel on top. I added some nuts and chocolate chips to mine and a little bit of coffee, which is something I usually add to chocolate for the extra flavour when I'm baking with it.

When the brownies were cooled down i frosted them, although the chooclate brownie frosting I used wasn't as thick as i would have liked, but still complimented the brownies nicely.


Next came the layer of chopped nuts...


And then the swirls of caramel...


Then they got taken out of the pan and into a box to take to my cousins house =]