Monday, September 21, 2009

Toaster Smores

I had a handful of marshmallows leftover just sitting in my pantry, waiting for the heat of the sun to melt them all together. So before I could let that happen,what a shocker, I decided to use them. My aunt was over with her adorable little daughters, so I wanted to make them a mild mess free treat with the marshmellows. I was thinking about rice crispy treats, but that was before I remebered we had a box of graham crackers! And thus, the idea of fixing up some smores was born.
No time to head out in the woods and make yourself a campfire to roast up some marshmellows? No problem. Smores, meet the toaster oven...

Ingredients:
-Marshmallows
-Graham Crackers
-CHOCOLATE!

Directions:
1. Start of with laying out a row of even squares of graham crackers along a baking sheet lined with aluminium foil (the foil makes the cleanup easier)
2. Cut all the marshmallows halfway in half, and roll the cut open side in chocolate chips (mini chocolate chips would stick better) or tuck in a chocolate chunk.


3. Pinch the marhmallow closed, as closed as it can get, and then place onto a graham cracker.


4. After all the marshmallows are each comfortably placed onto a graham cracker, plop them into the toaster oven/oven at abot 200-300 F., and take them out as soon as the marhmallow starts browning to the toasty roasty consistency you want it to.

5. After you take them out of the oven, yes, you can indulge your mouth with one as soon as you take it out, just after you smoosh the second layer of graham cracker on top!


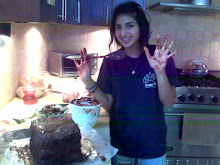
I wasn't planning on eating it, I promise...


...but it just wouldn't stop staring at me!

Thursday, September 17, 2009

Rugelach

My mom has cousins living in Israel, and one of them was coming to visit with her hubby and 1 year old. I don't get to see them that often, so I was very excited. Of course, of course, of course I had to bake dessert for the following night that they were coming over for dinner. Something tasty, wonderful flavors, great texture, and comes from the background of Israel. 1 word: R-U-G-E-L-A-C-H. I never made rugelach before this, but I was eager to try.
I found probably the best recipe I could have found, from the fabulous, Ina Garten. The link to the recipe is: http://www.foodnetwork.com/recipes/ina-garten/rugelach-recipe2/index.html

I didn't have the apricot preserves that the recipe called for, so what I did was
1. Quartered up some dried apricots.
2. Put them into the blender with a few very small drops of lemon juice, a splash of orange juice, and however much sugar I needed to sweeten it up.
3. I pureed everything together, adding as much hot water as I needed to thin out the puree.


I really liked the little creation I had made as my replacement for the apricot reserves. It had a nice texture from the apricots which couldn't get completely pureed, and was perfectly sweet. In the future, I will definatlly use this puree again instead of buying a whole jar of apricot preserves, although one day I have to try the preserves to compare the differences. Anyhow, both ways seem delicious.

As far as the assembly of the rugelach went, it was a bit time consuming, but all the steps were very simple.
Start out with rolling one of the 1/4's of the dough into a round cirle. Don't worry about getting the edges straight, because the edges are going to be unseen after you roll them up anyways.

Next spread out your layer of apricot puree (I spread it out with a brush)

Sprinkle on the sugar/nut mixture, and then cut the cirlce into 12 even wedges.


Roll up a wedge at a time, starting from the biggest side of the triangle wedge.


After you've got them all rolled up and on a baking sheet, give them all an egg wash, and then sprinkle on the cinamon sugar mix


These rugelach were one of the best things Iv'e every baked. That surprises me, because I didn't even think I like rugelach. Everytime I bake somthing, I can't help but think of all the things I could have added or shouldn't have. But these, oh these were just about perfect. The only complaint I would have with these, besides being so addictingly good, is how the sugar sprinkled on top of them created a hard chewy crust on the bottom of each, although that complaint was turned into a complament by many of the guests who enjoyed these treats with me, since they liked that sugary crust on the bottem.


We started out with 48 ruhgelach, I mean 45, considering all the ones I managed to sneak into my mouth right when they came out of the oven, at the begining of the night...


And were left with...

Wednesday, September 16, 2009

Rocky Road Brownies

My friend's birthday was coming up, and of course I had to bake her something. Whenever we go to this certain chocolate store in a shopping center, she always samples their rocky road, and so I knew I had to bake her something with rocky road in it. And what goes better with anything than a nice chocolaty brownie? And so, I went into the kitchen to bake some rocky road brownies.

The good thing about these brownies, is that you can pretty much use any brownie recipe you like. Just be sure not to use an overly fudgy recipe, or else the brownies will be too heavy with everything going on.
Here is a link to a website which gives you a huge variety of brownie recipes to search from, to find one that is the chocolaty consistency and flavor you want: http://browniepower.com/

Halfway through the brownies cooking process, I took them out to put a layer of marshmallows, chocolate chips/chunks, and walnuts.

As far as putting mini marshmallows vs. chunks of big marshmallowa goes, the cut up marshmallows melt all over the top, while the mini marshmallows keep their shape better. To me it didn't matter, but all I had was big marshmallows on hand which i quarted up, so I used those.


I was a big in a rush, because we were havving a mini surprise party for the birthday girl, and I needed to get there on time with the rocky road brownies, so I had to cut them up before they were fully cooled down. The brownie recipe I used was too fudgy so cutting them was a bit of a mess!

No worries though, because my mouth had a good time cleaning up the fallen fudgy pieces of the brownies!

I did however plop them into the fridge for a little bit, to speed up the cooling process, and then somewhat cut them in the best way I could...

Overall, these messy, nutty, marshmellow invested, chocolaty brownies, gave us and the super surprised birthday girl, at her surprise gathering a super duper fun time, filled with giggles, chocolatey lips, and very satisfied tummies!

Sunday, September 6, 2009

Vanilla Almond Biscotti

Story of my life: mom always yelling at me because of the slightest mess Iv'e made through baking! So the pieces fell perfectly together when treats ran out, and I wanted to bake something, and my grandma wanted me to come over to her house that following afternoon to bake something for her...:D
My family and I were going on vacation in a couple of days, and my grandma, herself, was going on a cruz in a few weeks, so we decided on baking something delicious, very low on fat, and of course, something that can be kept/stored for a long time. Biscotti!!!

I found the recipe very special, because this had been passed down through friends of my grandmothers generation, but still the ingrediants and directions remained very simple for such a delicious dessert.

-3 cups A.P. white flour
-2 cups sugar
-4 eggs
-1 1/2 tsp. baking soda
-1 1/2 tsp. baking powder
-2 tsp. vanilla extract
-1/4 cup nuts such as walnuts or hazelnuts, alightly roasted/toasted (optional)
-1 cup almonds , slightly toasted/roasted
-1 cup almond powder

Directions:
Sift and then mix all the dry igrdediants into one large bowl together. Mix in the eggs. Mix in everything else and let it all mix until everythings combined into a dough. Form the dough into 2 even sized loaves and bake in the oven at


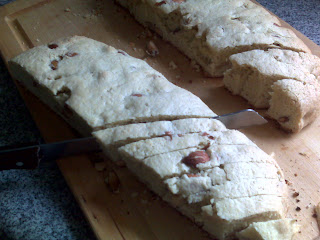
After the loaves cook in the over for about, take them out and slice them at an angle and place them on one of their flat sides into the oven for about another, flip them one more time, and let them bake for about another or until the edges start browning.


For the second biscotti loaf, we wanted to make the biscotti smaller, so we cut the load in half


The original recipe actually called for 2 cups of almonds, but since my grandmother had almond powder on hand, we added a cup less of almonds and a cup of almond powder instead.

The almond powder gave the biscotti a much stronger almond flavor then the whole almonds did, so I would add the almond powder into the dough the next time I bake these again. I you don't have any almond powder on hand, you can make i yourself by just tossing some almonds into the food prosseser, until they become as powdery an you want. Just be sure to use cold almonds, so that they don't turn into almond paste in the prosesser. If you don't feel like doing this, you can always add a few teaspoons of almond extract into the dough to give it a strong almond flavor.

Be sure to allow the cookies to cool completely before serving, in order for them to become as hard and crispy as possible. They store well and keep their crunchy texture in the freezer.