Thursday, July 30, 2009

Banana-Berry Parfait

Just a simple, quick, and I guess I could say healthy, snack for a hot summer afternoon. Iv'e made a berry parfait before, and there really isn't much to it, but they always end up looking elegant and yummy enough to post about. I used a simple wine glass for my cup, and pretty much just threw in a layer ofnon-fat vanilla yogurt on the bottem, berries (that have chilled in the freezer for about 30-60 mins). Then some non-fat cottage cheese (cottage cheese?...Oddly enough, I like the combination of it with the berries), then granola, and then sliced bananas. Pretty much, you can just keep layering the parfait with whatever ingredients you like, but I finished it wit a dollop of yogurt, leftover berries, and a little bit of granola on top.

*The lighting wasn't to good when I took this picture**


Do you know that point after you've eaten half of your parfait, and your starting your way down to the point where all the ingredients sort of come together in your next spoonful!?...I sure did :)

..but it sure didn't last too long

Wednesday, July 29, 2009

Chocolate Nutella Cake

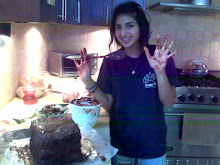
As much as my brother enjoys what I bake, he's been complaining about how often I do, and how he never does. He is pretty young, but my grandma, my aunt, and I all love baking, so maybe it just runs in the family. He wanted to bake a chocolate cake with his own made up recipe, and I decided on helping him. He made a list of the basic ingredients he knew to put in the cake, and I added a few extras. The measurments were figured out along as we made up the cakes recipe, but overall, the texture and flavor of the cake was pretty good.

Chocolate Nutella Cake
-3 eggs
-1/4 cup dark brown sugar
-1/4 cup white sugar
-1/2 cup oil
-1 tsp. coffee
-1 1/2 tsp. vanilla extract
-1/4 cup milk
-1 1/4 cup white AP flour
-1/2 tsp. salt
-2 tsp. baking powder
-1 tsp. cocoa powder
-1 tsp. Orange Juice (optional)
-1/3 cup chocolate chips
-1/3 cup chopped hazelnuts (I didn't have any on hand ): )
-1/4 cup AP flour
-1/4 cup-1/2 cup nutella (based on how fudgy you want your cake)
-Melted Chocolate and Sprinkles to decorate (optional)

Directions:
1. In a large bowl, beat together the eggs, sugars, and oil.
2. Add in the coffee and vanilla and beat until all combined. Add 1/4 cup of nutella, or 1/2 cup for a fudgier cake
3. In a seperate bowl, sift togther the flour, salt, baking powder, and cocoa powder all together.
4. Alternate mixing in the sifted flour mixture with the milk and orange juice into the egg mixture, until it's all combined together
5. Toss the chocolate chips and hazelnuts in the extra 1/4 cup of flour (to prevent the chocolate chips/nuts from sinking into the bottom of the cake), until each chocolate chip/hazelnut is evenly coated with flour. Pour the flour coated chocolate chips and hazelnuts into the batter and mix in.
6.Pour the batter into a greased pan and bake at 350 F for 25-30 minutes.


To add a little something extra to the cake, once its cooled down, take it out of the pan and melt about 1/3 cup of chocolate. With a wisk or a fork, drizzle it over the cake, however way you like, and then top it of with some sprinkles while the chocolate is still melted.

If I would have thought of this earlier (and was up for the extra calories ;p), I probably would have sliced the cake down the middle and spread on a layer of nutella and chopped up hazelnuts onto the bottem half, and then closed it with the upper half of the cake!

Sunday, July 26, 2009

Peanut Butter and Chocolate Covered Banana with Nuts

A few weeks ago, half a banana was eaten, and the other half layed unappealingly lonely on the counter for the rest of the afternoon. So what's a girl who's never eaten a chocolate covered banana before supposed to do? That's right, I went to the cupboard and grabbed a handful of chocolate chips to melt, to smear onto that banana! I do love bananas with a drizzle of peanut butter on them, and I do loveee peanut butter with chocolate, so i think we already know what happened next...;)

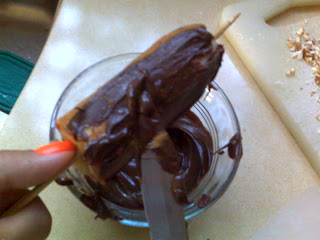
After I inserted a stick into the banana I smeared an even layer of peanut butter all around it

After the peanut butter on the banana hardened up for about 15 minutes in the freezer, it made spreading a layer of melted chocolate onto the banana a lot easier

Which then dove its way into a pile of nutss...

I only had almonds on hand so I chopped them up and they still added a great nutty crunch
(I only coated half the banana in nuts, and placed the nutty side down on the tray so that none of the chocolate touched/stuck onto it)

Once the whole things done and coated in whatever toppings you like, plop it into the freezer and put it into the refridgerater for 30-45 minutes before you want to eat it

Saturday, July 25, 2009

Lots and Lots of Different Cupcakesss!

Through out last year, I baked plenty, but didn't think of making a blog at that time, so I rarely photograghed my food. I was looking through old pictures and was fortunate enough to find a picture of something I had baked for a friend's birthday. We had a memory of craving cupcakes after passing a sprinkles cupcake and crumbs cupcake shop and so of course I went with cupcakes! She's one of my closest friends, so I decided on making her a variety of cupcakes with flavors she picked out.
I don't remeber the basic cupcake recipe I used, but the flavors added are simple enough to add to any cupcake recipe you like
The picture quality itself isn't that great and each cupcake was only photographed once so I didn't have much variety to choose from for the best looking pictures of each. The little papers stuck onto each cupcake have the flavor and frosting types of each cupcake written on them, though its sort of blurry

Cupcake #1
Flavor: Vanilla Cupcake with Nutella Swirl
Frosting: Vanilla Buttercream mixed with Nutella
Topping: Small Chocolate Chunks and Tuxedo Chocolate Covered Strawberry


Cupcake #2
Flavor: Chocolate Cupcake with Reese's Peanut Butter Cup chunks
Frosting: Peanut Butter Frosting
Topping: Reese's Peanut Butter Cup Crumbles

(the link to this recipe is originally from http://icecreambeforedinner.blogspot.com/2008/07/chocolate-peanut-butter-cup-cupcakes.html, an amazing and absolutely deliciousss blog!)

Cupcake #3
Flavor: Cinamon Sugar with Pecans and Walnuts
Frosting: Cinamon Cream Cheese Frosting
Topping: Pecans and Walnuts and and a Small Sprinkle of Cinammon


Cupcake #4
Flavor: Chocolate Cupcake with Chocolate Covered Caramel Chunks
Frosting: Vanilla Buttercream with Nutella Swirls
Topping: Chocolate Coated Caramel Chunks and Chocolate Covered Strawberry with White Chocolate Stripes


I packaged all 4 cupcakes up in a plastic container and took it to school the following morning to surprise my friend and make her birthday nutrition/lunch at school a little more satisfying ;)

Chocolate Chip Cookie Brownies (C.C.C.B.)

Two of my friends birthdays were recently on the same day. We all met up togther for lunch with some other friends, and of course, you've got to have dessert on your birthday! One birthday girl is a big fan of brownies and the other of chocolate chip cookies, and I had spotted a recipe which layered chocolate chip cookie dough onto brownie batter on http://anotheronebitesthecrustblog.com/, an amazing blog that has all my favorite ingulgences in low-fat versions! So of course, I found a great brownie recipe as well as a chocolate chip cookie dough recipe to pile onto each other for the perfect birthday treat.

The brownie recipe I got was from, probably favorite food network star, Ina Garten, and I also halfened the recipe since I needed only a thin layer. The recipe given for her "Outrageous Brownies" is:
-1 pound unsalted butter
-1 pound plus 12 ounces semisweet chocolate chips, divided
-6 ounces unsweetened chocolate
-6 extra-large eggs
-3 tablespoons instant coffee powder
-2 tablespoons real vanilla extract
-2 1/4 cups sugar
-1 1/4 cups flour, divided- 1 cup for batter and 1/4 cup in the chips and nuts
-1 tablespoon baking powder
-1 teaspoon kosher salt
-3 cups diced walnut pieces

Directions
1. Preheat oven to 350 degrees F. Grease and flour a 13 by 18 by 1 1/2-inch sheet pan.
2. Melt together the butter, 1 pound chocolate chips, and bitter chocolate on top of a double boiler. Cool slightly. Stir together the eggs, instant coffee, vanilla and sugar. Stir in the warm chocolate mixture and cool to room temperature.
3. Stir together 1 cup of the flour, baking powder and salt. Add to cooled chocolate mixture. Toss the walnuts and chocolate chips with 1/4 cup flour to coat. Then add to the chocolate batter.
4. Pour into prepared pan. **I kept some exra brownie batter (a few tablespoons) to drizzle on top of the cookie batter going on top*
5. Bake for about 30 minutes, or until tester just comes out clean. Halfway through the baking, rap the pan against the oven shelf to allow air to escape from between the pan and the brownie dough. Do not overbake! Cool thoroughly, refrigerate well and cut into squares.

^^^^ ^^ ^^ ^^ ^^ ^^^^
If your making C.C.C.B.'s preheat the oven to anywere from 325-350F. Also don't put the brownie batter into the oven without putting on the layer of chocolate chip cookie dough over it first (recipe below)

For the layer of chocolate chip cookies I tried to find a recipe that had the longest cooking period possible to match up with the full half an hour of the brownies cooking time. This recipe I found only had to be baked for 15-17 and can be found on http://allrecipes.com/Recipe/Best-Big-Fat-Chewy-Chocolate-Chip-Cookie/Detail.aspx. To this recipe, I didn't add the extra egg yolk listed in the ingredients.

I actually made this batter before I made the brownie batter, and just let it 'chill' (haha get it..i know, it's not that funny) in the fridge while it was waiting. After I had the brownie batter poured into the pan, I poured the chocolate-chip cookie dough batter on top of the first layer


I then spread it out, and while spreading, I sort of dug into the brownie batter to get streaks of both batters mixed into each other


And with the extra brownie batter, I drizzled lines across the pan with it, which I then swirled in even rows


And just in case you think your kitchen is the only one that got messy while baking the batters..


Anyways, when putting the C.C.C.B.'s into the oven, i used the temperature of about 340 F, which was in the middle of both recipes cooking times, and I baked them for about 25 minutes total. The result is a more fudgy brownie with a chewy chooclate chip cookie on top, which tasted amazing with vanilla icecream! I also put the extras into the fridge which gave them such a nice chewy and rich texture.
Milk, meet your new best friend...

Focaccia with Red Pepper Tomato Soup

I had half of my day booked with nothing to do, and since the house was completely vacant of people, something that doesn't happen to often, I decided on spending my day in the kitchen cooking a nice hardy dinner. Nothing compliments any dinner better, then a nice serving of bread to go with it, and what can go wrong if that bread is flavored with garlic and herbs?! And so I found a perfect focaccia recipe in "The Essential Baking Cookbook."

The recipe given was:
-7 g. 91/4 oz) sachet dried yeast
-1 teaspoon caster sugar (I make my own by blending it in the coffee grinder for a few seconds)
-2 tablespoons olive oil
-3 1/4 cups (405 g/13 oz) white bread flour (I used wheat for half)
-1 tablespoon full-cream milk power (I didn't have any on hand, and wasn't quite sure what it even was, so I would have mixed whole-milk with cornstarch, but since I dind't have any cornstarch, I used rice flour which also works as a thickning agent, to mix in with the whole-milk)
-1/2 teaspoon salt

Topping
:
-1 tablespoon olive oil
-1-2 cloves garlic crushed
-I added 2 tablespoons of finely chopped onion
-fresh rosemary springs or leaves
-1 teaspoon dried oregano
-1-2 teaspoons coarse sea salt
-Black olives (I didn't use them)

Directions:
1. Lightly grease a 28 x 13 cm (11 x 7 inxh) baking tin. Put the yeast, sugar and 1 cup (250 ml/8 fl oz) warm water in a small bowl and stir well. Leave in a warm, draught-free place for 10 minutes, or until bubbles appear on the surface. The mixture should be frothy and slightly increased in volume.

2. Sift 3 cups of the flour, the milk powder and salt into a large bowl. Make a well in the centre and add the yeast mixture. Beat with a wooden spoon until the mixture is well combined. Add enough of the remaining flour to form a soft dough, and then turn onto a lightly floured surface.

3. Knead for 10 minutes, or until the dough is smooth and elastic. Place the dough in a large, lightly oiled bowl. Brush the surface of the dough with oil. Cover with plastic wrap or a damp tea towel and leave in a warm place for 1 hour, or until well risen. Punch down the dough and knead for 1 minute. Roll into a rectangle and place in the prepared tin and the cover with plastic wrap. Leave to rise in a warm place for 20 minutes. Using the handle of a wooden spoon, form indents 1 cm (1/2 inch) deep all over the dough at regular intervals.

Cover with plastic wrap and set aside for 30 minutes, or until the dough is well risen. Preheat the oven to moderae 180 C (350 F/Gas 4)

4. For the Topping, brush the combined olive oil, garlic, and onion over the surface of the dough. Top with the olives optional), rosemary springs, then sprinkle with oregano and salt.


5. Bake for 20-25 minutes, or until golden and crisp. Cut into large squares and serve warm.


Through the rising intervals the focaccia had, I multi-tasked by making this soup in the mean time;
I was looking through a cooking magazine a while back and found a red pepper soup recipe. I didn't buy the magazine, but since I admired the recipe so much, I tried memorizing the basic steps and ingrediants of it. This seemed like a great time to make it knowing it would compliment the focaccia perfectly. I couldn't completely memorize the recipe, and I had more tomatos on hand then bell peppers, so I turned it into more of a tomato soup with red peppers.
I used:
-3 Red Bell Peppers
-7 medium tomatos
-Olive Oil (to roast the veggies)
-1/4- 1/2 an onion
-1 can of veggie stock
-2-4 tablespoons of cream or chunks of fresh mozzarella
-Salt and Pepper
-Grated parmesan to garnish (optional)
-Fresh basic to garnish (optional)
-Focaccia toping (recipe above, optional)

Directions:
1. Toss the bell peppers with olive oil and some freshly ground black pepper, after you have seeded and sliced the peppers, and then let them roast in a 400 F. oven for about half an hour.
Then add the tomatoes and onions for another 15 minutes, which have also been smeared with some olive oil and the leftover focaccia topping


2. Once the roasted veggies have cooled of just a bit, throw them into the food proccesor (try not to pour in the excess olive oil with them, but save some of it to drizzle on top of the soup) with a can of veggie stock (or however much you need to thin the soup out to your liking), the chunks of fresh mozzarella cheese, and a few heaping pinches of salt as well as some pepper

3. Once its all fully pureed together, you may the mixture to get rid of any seeds from the tomatoes, or just put it onto the stove to heat, and serve with grated parmesan cheese and basil on top. You can also drizzle any of the saved olive oil, that was used to roast the veggies on top.


After a good few hours in the kitchen, hot soup with a side of focaccia was finally ready to be eaten...

..every single bit of it =)

Thursday, July 23, 2009

Rice Krispies

My aunt called me over once again to bake some treats with her two lovely daughters as well as my brother. She kept it simple, and went with the classic rice krispy treat.
The only ingredients necessary were 6 cups of rice krispy cereal, 10 ounces of marshmallows, and 3 tablespoons of margarine (I used oil).

To start it off, melt your marshmallows in a pan with the margarine/oil (if you're worried about the marshmallows sticking to your pan, you can simply buy premade marshmellow fluff)


Next, mix in the melted marshmallows with the rice krispies until they're completely combined together


Remember that the marshmallow mixture is extremely sticky and will constantly stick to your mixing device, so it takes a good few minutes to really layer/mix the crispies with the marshmallow all together


When the fully combined mixture has cooled off a bit spread it out onto an ungreased dish smooshing it all down together (the more compact/dense you want your rice crispies, the cooler the mixture has to be) When it's cooled, you can cut the rice crispie treats into all sorts of shapes with a cookie cutter.


If I had the time, or thought of it earlier, I would have definitely drizzled chocolate over the tops of the crispies with sprinkles of sprinkles on top, or mixed in mini chocolate chips into the batter for a chocolatey twist to the rice krispy treats. However, plain or with chocolate, they taste declicious either way.

The fun shapes were given to the kids, and the extra ends were formed into a nice fat lump for me

Monday, July 20, 2009

Crepes with Chocolate & Cream & Strawberry Puree..oh my!

Occasionally, I will find some time to make my brother a sweet treat for breakfast or lunch, and one of his favorites is a crepe! Unfortunatley, I didn't have any nutella on hand to smear on the crepe, so instead I finally chopped up some chocolate chips (you can use any type of chocolate, the better quality chocolate you use, the better flavor you will get), so that it melted instantly when placed on the crepe

The recipe I used was a basic one I had found years ago (unfortunately, I can't find the link to the website that provided me with such an amazing recipe, so if anyone finds out the link from were the recipe originally came, please send it to me. Thanks, and once again all kudos go to the person who originally is responsible for coming up with this recipe)
I usually halfen the recipe for just a few crepes and add a couple drops of vanilla and powdered sugar to sweeten it up.

-4 eggs
-1/4 teaspoon salt
-2 cups flour
-2 ¼ milk
-¼ cup melted butter or margarine

Directions;
1. Break all eggs into a bowl with salt and whisk together until the egg looks uniformly yellow
2. Slowly add the flour (may look a little lumpy so sift it first)
3. Alternate pouring in the flour and milk, to the mixture (start with the flour and end with the flour)
4. Whisk it all together until it looks smooth
5. Add melted butter and whisk until the batter is smooth again
6. Cover the batter, put in refrigerator

To get a thin crepe, drop in a couple of tablespoons of batter into your buttered pan (to make it nonstick) , and instantly spread it out by tilting the pan until a thin layer of batter covers the whole skillet.


After you flip the crepe, sprinkle on the chocolate (as well as any other additional toppings you might want to add; Berries, Nuts, Caramel, etc..) immediately, because the other side will cook extremely fast and you want to give the chocolate enough time to melt.


After the crepe was fully cooked, I folded it in half, and sprayed on some cream (the premade ones that can get sprayed out when you press the nozzle of the container, which started melting when it touched that hot hot crepe!

I had pureed stawberries previously to flavor an icing, and used the excess I had stored in the fridge to drizzle over the crepe, and then sprinkled on some extra chocolate that I had chopped up a bit more roughly.


Chocolate Chip Banana-Nut Muffins with Crumble Topping

Once again I had overripe bananas on hand, and decided to use my favorite banana bread recipe which has been previously posted at http://browniescookiespieohmy.blogspot.com/2009/07/banana-breadcake-with-chocolate-chips.html
This time I changed the recipe up a bit, aside from my basic changes I used in the past.
First of all I made the banana bread into muffins instead.
I also changed the recipe up to make the muffins more low-fat.
I used 1 cup of whole-wheat flour and then remaining 1/2 white flour.
I replaced half the butter with applesauce which suprisingly didn't change the texture of the muffins much
Finally, just for the sake of experimenting with textures, I put half the amount of milk listed (low-fat) and for the remaining 1/8 cup of milk, I added 1/8 cp of greek yogurt mixed with plain yogurt (all non-fat), which didn't make a dramatic change in texture, but was a smich noticable.
I couldn't squeeze in all the batter into all the muffin tins, so with the extra batter I mixed up the extra chocolate chips and nuts I had chopped up to get added into the batter, with brown sugar, flour, and some applesauce and flour and the smallest pinch of baking soda. The thick topping got crumbled onto each of the muffins.


Monday, July 13, 2009

Whole-Wheat Cupcakes/Muffins with Homemade Frosting

My little cousin had to bring treats to her camp for the last day. My aunt called me up and told me she was going to bake something with my cousin and asked me to help.

She uses this basic recipe for all her cakes, cupcakes, and recipes which originally came from an apple cake recipe:

-6 eggs
-2 cup. Sugar
-3/4 cup. Oil
-3 cup. Flour
-3 Tsp. Baking Powder
-1/2 cup. Orange Juice
-Vanilla

Directions:
1. Mix the eggs, sugar, oil, and vanilla together.
2. In a separate bowl, mix the flour and baking powder together
3. Alternate adding the flour and baking powder mixture and the orange juice to the wet ingredients, starting with the flour and ending with the flour
4. Bake at 350 for 45 minutes.

My aunt changed the recipe up a little by using what she only had on hand
The flour she used was whole-wheat and used light brown sugar
She also didn't add the orange juice, which gave the cupcakes a texture of muffins.

The cupcakes should get filled up about 2/3 full each

Scooping the batter into the cupcake tins with an icecream scooper, is a great technique, because it assures even amounts of batter in all the cupcakes

Even with the texture of a muffin, after they had baked and then cooled, they got frosted with a homemade frosting

Frosting Recipe:
-1 cup butter, softened
-8 cups confectioners' sugar
-6 tablespoons milk
-2 teaspoons vanilla extract

You can just beat all the ingredients together in a mixer making sure to add the confectionary sugar a cup or two at a time. It will be pretty thick, so if you want it creamier just add a couple more tablespoons of milk.


And with a little food coloring, the frosting was turned into a light blue, which got swirled onto each cupcake


Of course my cousin made sure that each cupcake got a nice big sprinkle of a princess sprinkles mix

Saturday, July 11, 2009

Brown Sugar Scones w. Lemon/Vanilla Drizzle

I have pials of recipes just sitting in a binder which Iv'e never tested out. Last week, when pastries ran out in the kitchen, I decided to seek into my binder of recipes I had printed out, and make one. I barely make scones, and the ones I make are with plain white flour and sugar, so a recipe for brown sugar scones, really caught my eye. I originally found the amazing recipe on http://veganvisitor.wordpress.com/ which providedes the very recipe on http://veganvisitor.wordpress.com/2008/04/03/brown-sugar-scones/.

The recipe is all vegan, but I made a couple of changes when I baked mine:
- Instead of 2 cups all-prupose flour and 1/2 cup whole-wheat flour I put in 1 1/2 cups all-purpose flour and 1 cup orf whole-wheat flour
- I didn't have any vegetable shortening on hand, as well as any shortening, so I replaced the shortening with butter
- I didn't have soy milk either, but regular works just fine
- I threw in some blueberries, dried cranberries, oats, chocolate chips, and some chopped up almonds and walnuts

I knew the flavor of coffee would go great with these scones, but wasn't quite sure how to incorporate it into the scones. I decided to press little stripes of coffee onto the scones with a brush, which gave the scones a unique look to them. I also sprinkled oats onto the scones with oats in order to tell the difference.


After they were baked, I felt like they could use a little bit more flavor and I wanted to add more to the apperence of the scones. To contrast the flavor of the blueberries I wanted a lemony flavor and some vanilla as well. And so, I mixed up some lemon juice and vanilla juice with powdered sugar, until it became a nice thick drizzling consistency, and then swirled some on top of each of the scones after they had cooled.

The Glaze hardened nicely after about a half hour and tasted delicious on the scones