Tuesday, December 8, 2009

Triple-Layer Chocolate Cake with Chocolate Ganache

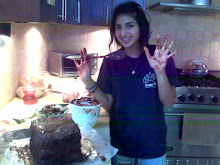
My dad's birthday was coming up, and while I can get away with baking a fudgy brownie to satisfy my friends chocolate cravings on their bithdays, the situation remains different with my dad. He loves anything with good solid chocolate, (who do you think is the one who seeks out for my gharadelli chocolate chips and eats them all?!), and since hes my dad, why not spend a day of baking with chocolate, chocolate, and more chocolate for his birthday?

Ever since I was lucky enough to indulge into a gourgousely layered rich chocolate cake at a wedding lunchen, I was inspired to make one of these cubes of heaven myself. I didn't challenge myself to far, as far as finding interesting flavors to incporporate into the cake, finding challenge enough in baking a huge batch of devils food cake enough for 3 cakes , evening out each layer of cake, layering them on top of each other with home-made ganache, and why not make some chocolate leaves to top it all of!

I found a great guided recipe for the whole thing, which was self-explained very well, and as far as the cake, it tasted so good (with a hint of instant coffee added) that I'll definatly consider using the cake recipe to incorporate into others. The link from where I found the recipe (though I increased the serving size of the reipce) can be found right here: http://www.davidlebovitz.com/archives/2007/08/devils_food_cak.html

Below I posted my pictures of this decadent delightful chocolate cake through the steps I took in making it, but I must warn you, side affects may include extreme drooling and sudden intence chocolate craving...


1.


2.


3.


4.


5.


6.


7..
All you have to do to make chocolate leaves is spread a layer of melted chocolate onto clean leaves, and peel the chocoate of once its hardened. Use a little bit of the access melted chocolate as glue, to stick the leaves onto the cake.


8.


9.

Tuesday, November 3, 2009

Apple Cake

My mom was taking my little brother over to his friend's house for a little holiday celebration (Rosh Hashanah, they were having a sukkah party), and wanted to bring a fruity treat over, with fruits being a main appreciation during that holiday. However, she only had about half an hour to make a cake, and I didn't have to guess hard to predict that she was hoping she could bake my aunt's famous apple cake (a recipe she got from a friend from germany!), which has evolved into a family favorite.

It has been constantly made not just my aunt, but my grandma and occasionally my mom, and lets not forget myself! Even the base of the recipe itself ,without the apple on top is a fabulous basic cake batter to work with. It is nice and moist, but still has a sturdy structure.

Anyways, there was no way the neat freak, aka my mom, could make a cake in less than half an hour, so I immediatly started peeling some apples for her (about 6) and took buttered a baking dish. Once she managed to mix all the ingredients together, a great advantage of the cake is that the mixing steps are so simple, I started layering the apples onto the cake, which I had lightly tossed into some cinamon, brown sugar, and sugar. My mom and I both agreed that some slivered almonds would add a happy crunch to the cake and would be a good combination to the apples, so not only did I add slivered almonds to the cake but I melted some butter with cinamon and brown sugar, and drizzled that over the apples and almonds layered onto the cake. Yummy!


I would have pre heated the oven as well, but their wouldn't have been enough time to bake the cake at our house, so my mom shrewdly, or so she thought, decided on baking it at my brothers friend house. But that is where all the trouble started;
Don't worry, my mom didn't drop the cake on her way to their friends house. However, the oven still didn't seem very friendly to invite to the cake into it, and literally refused to go onto the bake setting. The buttons were all set to 350 F on the bake setting, and after about half an hour in the oven, or so I heard, my mom
checked on the cake to see how it was cooking, and it was completely raw! Of course, out of all days for the oven not to work, it picked a day a delicious apple cake wanted to bake in it. So after minutes of stress and confusion, the oven seemed to cut my mom and my brother's friend's mom some slack, and decided to let its broil setting to work. And so the cake was cooked on the broil setting with a big blanket of foil wrapped on top of it. So the result? Umm, well it couldn't end up being that amazing moist texture everyone loves, but it still had that delicious flavor and tasted even better with a dollop of whipped cream.
The actual flaw of the cake that wasn't he ovens fault was that my mom didn't cover every corner of the cake enough with foil, so a good amount of the edge of the cake was a burnt black color, which she was kind enough to take home..so I could photogragh? ;)


I wish I had better pictures of the moist apple-licious beuatifully colored apple cake it was supposed to look like, but I guess this is just an excuse for you to go ahead and bake this amazing cake and send me some pictures. No seriously, it tastes amazing, as long as your oven doesn't feel like broiling on you!

The recipe follows: APPLE CAKE

-6 eggs
-2 cup. Sugar
-3/4 cup. Oil
-3 cup. Flour
-3 Tsp. Baking Powder
-1/2 cup. Orange Juice
-Vanilla
-5-8 apples
-1 Tbsp.Cinamon, brown sugar, and sugar to toss the apples in (optional)
-1 Tbsp. butter melted in cinamon and brown sugar (optional)

Directions:
1.Mix the eggs, sugar, oil, and vanilla together.
2.In a separate bowl, mix the flour and baking powder together
3.Alternate adding the flour and baking powder mixture and the orange juice to the wet ingredients, starting with the flour and ending with the flour.
5.Slice the apples as thinly as you like and layer them onto the cake however way you like, after you've tossed them in some cinamon, brown sugar, and sugar (optional)
6. Optional: Sprinkle some slivered almonds on top, and about a tablespoon of butter melted with cinamon and brown sugar in it, on top of the cake.
7.Bake at 350 for 45 minutes.

Wednesday, October 7, 2009

Berry Gelato

Finally, an icecream maker machine has found its way into my kitchen! There have been so many times I have come across delicious icecream, sorbet, and gelato recipes that look so scrumpcious, creative, and much lower in fat then what you find in your local grocery store! Each one playing its role as a flavorful, creamy, icey, refreshing treat.
I am a big fan of berries, which is why I awlays keep a package of Trader Joe's frozen mixed berries on hand, so I'm always pretty comfortable in experimenting with berries as the base of my flavors for new recipes. I also wanted to take advantage of being able to make my frozen treat extra healthy, the healthier it is, the more scoops you get ;), so I decided to go with a berry gelato.

I didn't search too much to find a berry gelato base, and was confident in picking a recipe I found at http://www.recipezaar.com/Skinny-Peoples-Berry-Gelato-141620. The steps are pretty simple, meaning it isn't to hard to put it all together, and to be honest, the step that took me the longest (that I wasn't prepared for), was waiting for my icecream machine to chill in the freezer for over 24 hours! Ahhh, a little advice; read the intructions of any new device you get ahead of time, so that your not stuck waiting with a ready made batch of gelato batter that has to impatiently wait in the fridge for over a day, to let the icecream machine chill!

Instead of using a certain type of berry, I just threw in the 3 whole cups of mixed frozen berries that came all together in the package, which i let thaw for a bit. I take that back, knowing how impatient I am, you uprobably figured I let them thaw for 30 seconds-a minute in the microwave. :)

Overall, the flavor of the gelato was pretty good. The cornstarch, in the ingredients was noticable and for the future I would like to find a replacent for it. I used low-fat milk, which was fine for me, but if you would like a creamier gelato, use whole milk, or any milk with a higher fat content.


The only major thing I was disspaointed in, was the texture of the gelato. Throughout a few days in the freezer, it started to get a more solid texture, almost like a popsicle. However, that could have been, because the berry mixture was in the fridge a day longer then it was supposed to be, but hey, maybe I just mixed it for the wrong period of time. After all, this was my first time using an ice cream machine.

Monday, September 21, 2009

Toaster Smores

I had a handful of marshmallows leftover just sitting in my pantry, waiting for the heat of the sun to melt them all together. So before I could let that happen,what a shocker, I decided to use them. My aunt was over with her adorable little daughters, so I wanted to make them a mild mess free treat with the marshmellows. I was thinking about rice crispy treats, but that was before I remebered we had a box of graham crackers! And thus, the idea of fixing up some smores was born.
No time to head out in the woods and make yourself a campfire to roast up some marshmellows? No problem. Smores, meet the toaster oven...

Ingredients:
-Marshmallows
-Graham Crackers
-CHOCOLATE!

Directions:
1. Start of with laying out a row of even squares of graham crackers along a baking sheet lined with aluminium foil (the foil makes the cleanup easier)
2. Cut all the marshmallows halfway in half, and roll the cut open side in chocolate chips (mini chocolate chips would stick better) or tuck in a chocolate chunk.


3. Pinch the marhmallow closed, as closed as it can get, and then place onto a graham cracker.


4. After all the marshmallows are each comfortably placed onto a graham cracker, plop them into the toaster oven/oven at abot 200-300 F., and take them out as soon as the marhmallow starts browning to the toasty roasty consistency you want it to.

5. After you take them out of the oven, yes, you can indulge your mouth with one as soon as you take it out, just after you smoosh the second layer of graham cracker on top!


I wasn't planning on eating it, I promise...


...but it just wouldn't stop staring at me!

Thursday, September 17, 2009

Rugelach

My mom has cousins living in Israel, and one of them was coming to visit with her hubby and 1 year old. I don't get to see them that often, so I was very excited. Of course, of course, of course I had to bake dessert for the following night that they were coming over for dinner. Something tasty, wonderful flavors, great texture, and comes from the background of Israel. 1 word: R-U-G-E-L-A-C-H. I never made rugelach before this, but I was eager to try.
I found probably the best recipe I could have found, from the fabulous, Ina Garten. The link to the recipe is: http://www.foodnetwork.com/recipes/ina-garten/rugelach-recipe2/index.html

I didn't have the apricot preserves that the recipe called for, so what I did was
1. Quartered up some dried apricots.
2. Put them into the blender with a few very small drops of lemon juice, a splash of orange juice, and however much sugar I needed to sweeten it up.
3. I pureed everything together, adding as much hot water as I needed to thin out the puree.


I really liked the little creation I had made as my replacement for the apricot reserves. It had a nice texture from the apricots which couldn't get completely pureed, and was perfectly sweet. In the future, I will definatlly use this puree again instead of buying a whole jar of apricot preserves, although one day I have to try the preserves to compare the differences. Anyhow, both ways seem delicious.

As far as the assembly of the rugelach went, it was a bit time consuming, but all the steps were very simple.
Start out with rolling one of the 1/4's of the dough into a round cirle. Don't worry about getting the edges straight, because the edges are going to be unseen after you roll them up anyways.

Next spread out your layer of apricot puree (I spread it out with a brush)

Sprinkle on the sugar/nut mixture, and then cut the cirlce into 12 even wedges.


Roll up a wedge at a time, starting from the biggest side of the triangle wedge.


After you've got them all rolled up and on a baking sheet, give them all an egg wash, and then sprinkle on the cinamon sugar mix


These rugelach were one of the best things Iv'e every baked. That surprises me, because I didn't even think I like rugelach. Everytime I bake somthing, I can't help but think of all the things I could have added or shouldn't have. But these, oh these were just about perfect. The only complaint I would have with these, besides being so addictingly good, is how the sugar sprinkled on top of them created a hard chewy crust on the bottom of each, although that complaint was turned into a complament by many of the guests who enjoyed these treats with me, since they liked that sugary crust on the bottem.


We started out with 48 ruhgelach, I mean 45, considering all the ones I managed to sneak into my mouth right when they came out of the oven, at the begining of the night...


And were left with...

Wednesday, September 16, 2009

Rocky Road Brownies

My friend's birthday was coming up, and of course I had to bake her something. Whenever we go to this certain chocolate store in a shopping center, she always samples their rocky road, and so I knew I had to bake her something with rocky road in it. And what goes better with anything than a nice chocolaty brownie? And so, I went into the kitchen to bake some rocky road brownies.

The good thing about these brownies, is that you can pretty much use any brownie recipe you like. Just be sure not to use an overly fudgy recipe, or else the brownies will be too heavy with everything going on.
Here is a link to a website which gives you a huge variety of brownie recipes to search from, to find one that is the chocolaty consistency and flavor you want: http://browniepower.com/

Halfway through the brownies cooking process, I took them out to put a layer of marshmallows, chocolate chips/chunks, and walnuts.

As far as putting mini marshmallows vs. chunks of big marshmallowa goes, the cut up marshmallows melt all over the top, while the mini marshmallows keep their shape better. To me it didn't matter, but all I had was big marshmallows on hand which i quarted up, so I used those.


I was a big in a rush, because we were havving a mini surprise party for the birthday girl, and I needed to get there on time with the rocky road brownies, so I had to cut them up before they were fully cooled down. The brownie recipe I used was too fudgy so cutting them was a bit of a mess!

No worries though, because my mouth had a good time cleaning up the fallen fudgy pieces of the brownies!

I did however plop them into the fridge for a little bit, to speed up the cooling process, and then somewhat cut them in the best way I could...

Overall, these messy, nutty, marshmellow invested, chocolaty brownies, gave us and the super surprised birthday girl, at her surprise gathering a super duper fun time, filled with giggles, chocolatey lips, and very satisfied tummies!